AI-powered Defects Detection System for Alloy Wheel Manufacturer
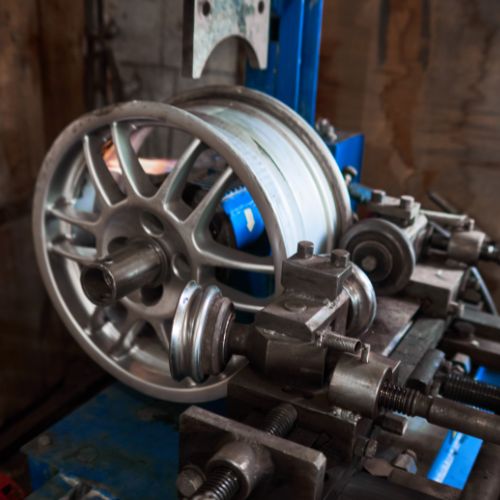
ThirdEye Data successfully delivered an AI-powered defect detection system for a leading alloy wheel manufacturer. The intelligent system uses computer vision and machine learning models to identify surface, dimensional, and machining defects in real-time during production. The deployment led to significantly reduced defect rates, enhanced product quality, and streamlined quality assurance operations across all production lines.
THE CUSTOMER
BUSINESS GOALS OR CHALLENGES
Business Goals
- Automate the defect detection process in alloy wheels to eliminate human errors.
- Meet the strict quality control benchmarks set by top global OEMs.
- Improve inspection efficiency, reduce cycle time, and maintain consistency in quality across batches.
- Scale the solution across all production lines while minimizing cost per inspection.
Understanding the Challenges:
- Manual inspections were inconsistent, error-prone, and resource-intensive.
- Meeting the precision and cosmetic standards of OEMs was difficult with human-based QA processes.
- Frequent production line stoppages due to false positives and missed defect identifications.
- Lack of real-time insights and traceability across inspection data.
Prerequisites and Preconditions:
A diverse and well-labeled defect image dataset, high-resolution industrial cameras, consistent lighting infrastructure, and scalable compute hardware were essential for training and deploying the AI models.
- Availability of high-resolution image datasets capturing a variety of defects in alloy wheels.
- Pre-established defect classification criteria from OEMs.
- Reliable lighting conditions (1000 ± 100 Lux) and optimal camera placement for image acquisition.
- High-performance computing infrastructure, both on-premise and edge-enabled.
- Collaboration with Customer’s quality engineering team for annotated data and continuous feedback.
THE SOLUTION
ThirdEye implemented a full-scale AI-based defect detection solution in a phased manner—starting from a PoC adhering to GM standards, followed by pilot deployment on a production line, and eventually scaling it across all lines. The solution utilizes deep learning models trained to detect a variety of structural and cosmetic defects with over 95% accuracy, providing real-time insights and automatic rejection mechanisms integrated with the manufacturing line.
High-level Solution Approach:
Image Acquisition System:
Installed high-res industrial cameras at multiple inspection points with controlled lighting for consistent image quality.AI-Powered Inspection Models:
Used CNNs and semantic segmentation models trained on a large dataset of annotated defects.
Applied transfer learning to speed up development and boost detection accuracy.
Real-time Inference & Decision System:
Deployed on edge devices for low-latency decision-making.
Integrated human-in-the-loop for complex case validation.
Categorized defects as critical, major, or minor, triggering automated rejections.
Continuous Learning:
Models retrained periodically using newly collected defect data to improve performance over time.
Technology Stack:
Computer Vision: OpenCV, YOLOv8, TensorFlow/Keras-based custom CNNs
Machine Learning: PyTorch, Transfer Learning, Semantic Segmentation Models
Hardware:
4K industrial-grade cameras
GPU-enabled edge devices (NVIDIA Jetson)
Lighting system: 1000 ± 100 Lux
Annotation Tools: CVAT, Labelbox
Deployment Infrastructure: Edge devices integrated with on-premise MES
Security: Encrypted data transfer, access control, and audit trails
VALUE CREATED
The system has been deployed 6 months back, we are sill in the phase of estimating the final ROI, Here are a few ROI calculations received from the customer based on the last 6 months performance:
- 95%+ defect detection accuracy achieved in real-time, reducing false negatives by 70%.
- 90% reduction in manual inspection efforts across all production lines.
- 30% improvement in production throughput due to faster inspection cycle times.
- 25% reduction in customer returns and rework associated with defective alloy wheels.
- Final ROI will be estimated in the next 9–12 months from full deployment based on savings in labor costs, reduction in scrap, and improved OEM compliance.
- Enhanced traceability and compliance with OEM audit requirements via automated defect logs.


