Before starting with this Apache Sqoop tutorial, let us take a step back. Can you recall the importance of data ingestion, as we discussed it in our earlier blog on Apache Flume. Now, as we know that Apache Flume is a data ingestion tool for unstructured sources, but organisations store their operational data in relational databases. So, there was a need of tool which can import and export data from relational databases. This is why Apache Sqoop was born. Sqoop can easily integrate with Hadoop and dump structured data from relational databases on HDFS, complimenting the power of Hadoop. This is why Apache Flume is an important part ofHadoop Ecosystem.
Initially Sqoop was developed and maintained by Cloudera. Later, on 23 July 2011, it was incubated by Apache. In April 2012, the Sqoop project was promoted as Apache’s top-level project.
In this Apache Flume tutorial blog, we will be covering:
We will be beginning this Apache Sqoop tutorial by introducing Apache Sqoop. Then moving ahead, we will understand the advantages of using Apache Sqoop.
Apache Sqoop Tutorial: Sqoop Introduction
 Generally, applications interact with relational database using RDBMS, and thus this makes relational databases one of the most important sources that generates Big Data. Such data is stored in RDB Servers in the relational structure. Here, Apache Sqoop plays an important role in Hadoop ecosystem, providing feasible interaction between relational database server and HDFS.
So, Apache Sqoop is a tool in Hadoop ecosystem which is designed to transfer data between HDFS (Hadoop storage) and relational database servers like mysql, Oracle RDB, SQLite, Teradata, Netezza, Postgres etc. Apache Sqoop imports data from relational databases to HDFS, and exports data from HDFS to relational databases. It efficiently transfers bulk data between Hadoop and external datastores such as enterprise data warehouses, relational databases, etc.
This is how Sqoop got its name – “SQL to Hadoop & Hadoop to SQL”.
Additionally, Sqoop is used to import data from external datastores into Hadoop ecosystem’s tools like Hive &HBase.
Now, as we know what is Apache Sqoop. So, let us advance in our Apache Sqoop tutorial and understand why Sqoop is used extensively by organisations.
Apache Sqoop Tutorial: Why Sqoop?
For Hadoop developer, the actual game starts after the data is being loaded in HDFS. They play around this data in order to gain various insights hidden in the data stored in HDFS.
So, for this analysis the data residing in the relational database management systems need to be transferred to HDFS. The task of writing MapReduce code for importing and exporting data from relational database to HDFS is uninteresting & tedious. This is where Apache Sqoop comes to rescue and removes their pain. It automates the process of importing & exporting the data.
Sqoop makes the life of developers easy by providing CLI for importing and exporting data. They just have to provide basic information like database authentication, source, destination, operations etc. It takes care of remaining part.
Sqoop internally converts the command into MapReduce tasks, which are then executed over HDFS. It uses YARN framework to import and export the data, which provides fault tolerance on top of parallelism.
Advancing ahead in this Sqoop Tutorial blog, we will understand the the key features of Sqoop and then we will move on to the Apache Sqoop architecture.
Apache Sqoop Tutorial: Key Features of Sqoop
Sqoop provides many salient features like:
- Full Load: Apache Sqoop can load the whole table by a single command. You can also load all the tables from a database using a single command.
- Incremental Load: Apache Sqoop also provides the facility of incremental load where you can load parts of table whenever it is updated.
- Parallel import/export: Sqoop uses YARN framework to import and export the data, which provides fault tolerance on top of parallelism.
- Import results of SQL query: You can also import the result returned from an SQL query in HDFS.
- Compression: You can compress your data by using deflate(gzip) algorithm with –compress argument, or by specifying –compression-codec argument. You can also load compressed table in Apache Hive.
- Connectors for all major RDBMS Databases: Apache Sqoop provides connectors for multiple RDBMS databases, covering almost the entire circumference.
- Kerberos Security Integration: Kerberos is a computer network authentication protocol which works on the basis of ‘tickets’ to allow nodes communicating over a non-secure network to prove their identity to one another in a secure manner. Sqoop supports Kerberos authentication.
- Load data directly into HIVE/HBase: You can load data directly into Apache Hive for analysis and also dump your data in HBase, which is a NoSQL database.
- Support for Accumulo: You can also instruct Sqoop to import the table in Accumulo rather than a directory in HDFS.
Apache Sqoop Tutorial: Sqoop Architecture & Working
Let us understand how Apache Sqoop works using the below diagram:
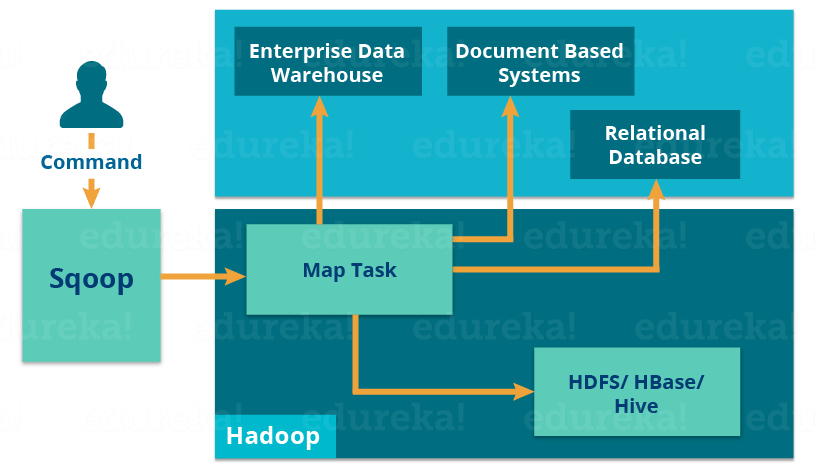 The import tool imports individual tables from RDBMS to HDFS. Each row in a table is treated as a record in HDFS.
When we submit Sqoop command, our main task gets divided into sub tasks which is handled by individual Map Task internally. Map Task is the sub task, which imports part of data to the Hadoop Ecosystem. Collectively, all Map tasks imports the whole data.
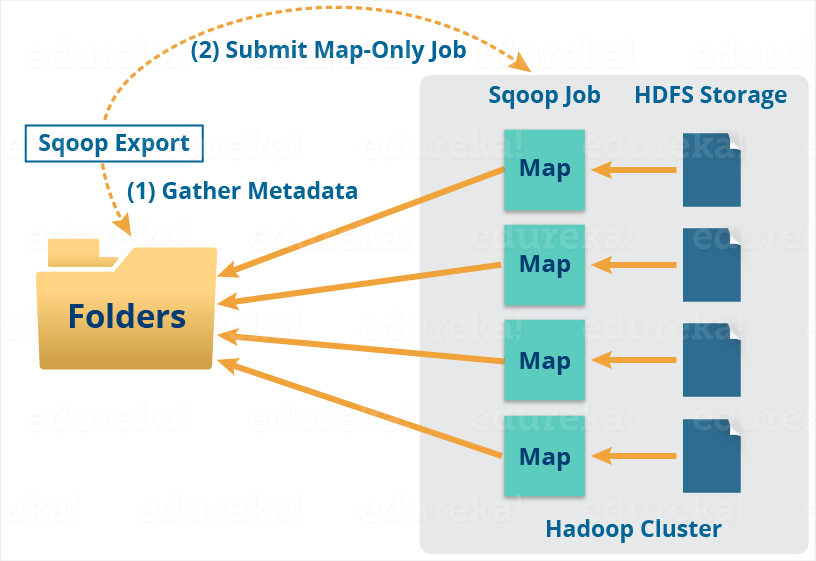 Export also works in a similar manner.
The export tool exports a set of files from HDFS back to an RDBMS. The files given as input to Sqoop contain records, which are called as rows in table.
When we submit our Job, it is mapped into Map Tasks which brings the chunk of data from HDFS. These chunks are exported to a structured data destination. Combining all these exported chunks of data, we receive the whole data at the destination, which in most of the cases is an RDBMS (MYSQL/Oracle/SQL Server).
Reduce phase is required in case of aggregations. But, Apache Sqoop just imports and exports the data; it does not perform any aggregations. Map job launch multiple mappers depending on the number defined by user. For Sqoop import, each mapper task will be assigned with a part of data to be imported. Sqoop distributes the input data among the mappers equally to get high performance. Then each mapper creates connection with the database using JDBC and fetches the part of data assigned by Sqoop and writes it into HDFS or Hive or HBase based on the arguments provided in the CLI.
Now that we understand the architecture and working of Apache Sqoop, lets understand the difference between Apache Flume and Apache Sqoop.
Apache Sqoop Tutorial: Flume vs Sqoop
The major difference between Flume and Sqoop is that:
- Flume only ingests unstructured data or semi-structured data into HDFS.
- While Sqoop can import as well as export structured data from RDBMS or Enterprise data warehouses to HDFS or vice versa.
Now, advancing in our Apache Sqoop Tutorial it is the high time to go through Apache Sqoop commands.
Apache Sqoop Tutorial: Sqoop Commands
Sqoop – IMPORT Command
Import command is used to importing a table from relational databases to HDFS. In our case, we are going to import tables from MySQL databases to HDFS.
As you can see in the below image, we have employees table in employees database which we will be importing into HDFS.
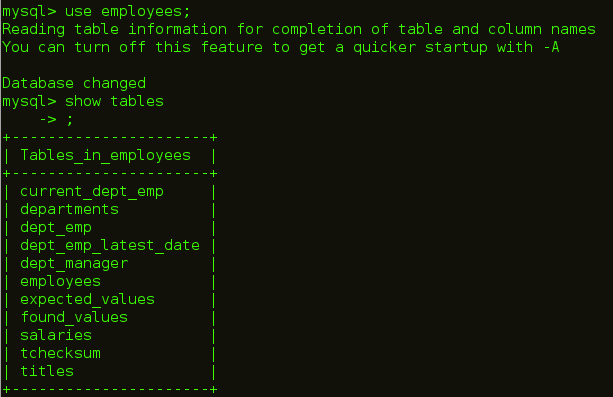
The command for importing table is:
1 | sqoop import --connect jdbc:mysql://localhost/employees --username edureka --table employees |
![]()
As you can see in the below image, after executing this command Map tasks will be executed at the back end.
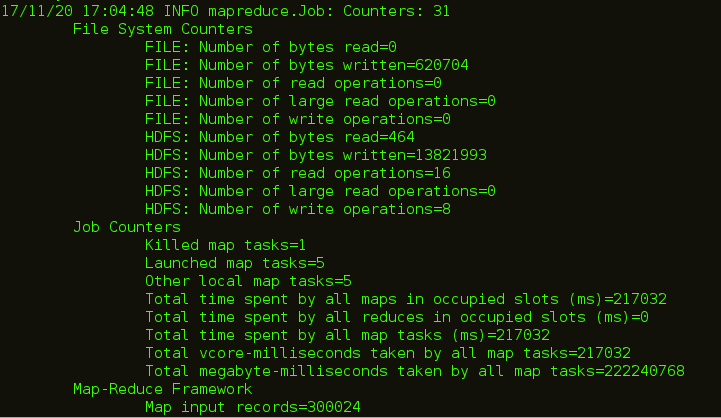
After the code is executed, you can check the Web UI of HDFS i.e. localhost:50070 where the data is imported.

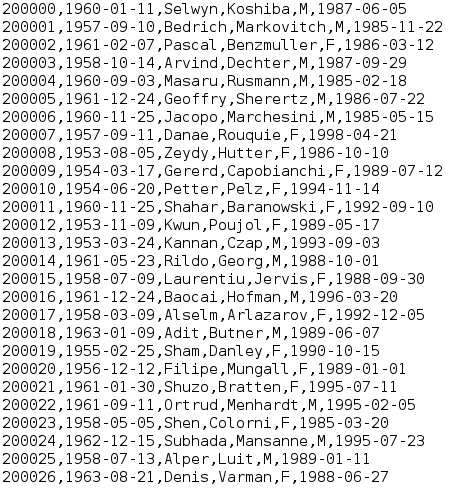
Sqoop – IMPORT Command with target directory
You can also import the table in a specific directory in HDFS using the below command:
1 | sqoop import --connect jdbc:mysql://localhost/employees --username edureka --table employees --m 1 --target-dir /employees |
Sqoop imports data in parallel from most database sources. -m property is used to specify the number of mappers to be executed.
Sqoop imports data in parallel from most database sources. You can specify the number of map tasks (parallel processes) to use to perform the import by using the -m or –num-mappers argument. Each of these arguments takes an integer value which corresponds to the degree of parallelism to employ.
You can control the number of mappers independently from the number of files present in the directory. Export performance depends on the degree of parallelism. By default, Sqoop will use four tasks in parallel for the export process. This may not be optimal, you will need to experiment with your own particular setup. Additional tasks may offer better concurrency, but if the database is already bottlenecked on updating indices, invoking triggers, and so on, then additional load may decrease performance.
![]()
You can see in the below image, that the number of mapper task is 1.

The number of files that are created while importing MySQL tables is equal to the number of mapper created.
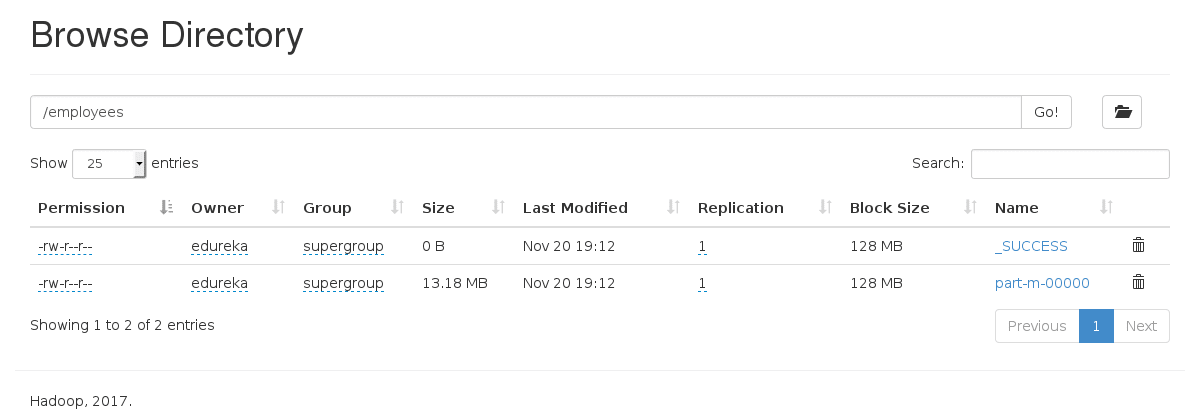
Sqoop – IMPORT Command with Where Clause
You can import a subset of a table using the ‘where’ clause in Sqoop import tool. It executes the corresponding SQL query in the respective database server and stores the result in a target directory in HDFS. You can use the following command to import data with ‘where‘ clause:
1 | sqoop import --connect jdbc:mysql://localhost/employees --username edureka --table employees --m 3 --where "emp_no > 49000" --target-dir /Latest_Employees |

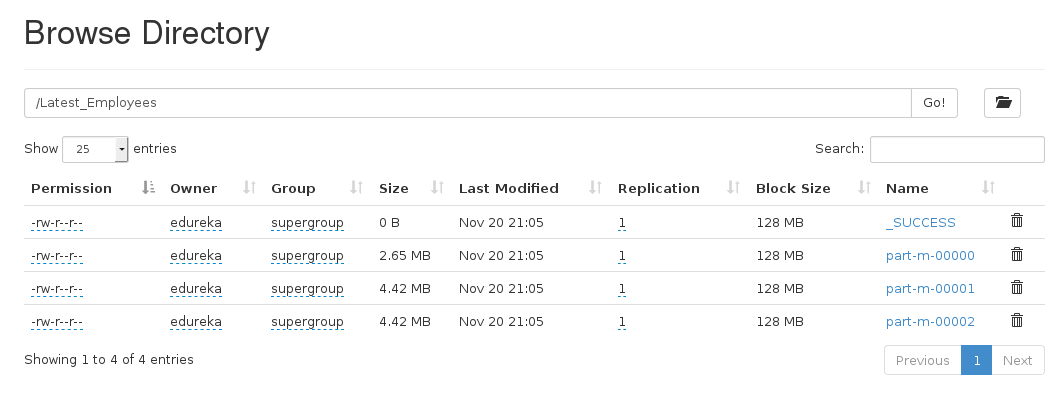
Sqoop – Incremental Import
Sqoop provides an incremental import mode which can be used to retrieve only rows newer than some previously-imported set of rows. Sqoop supports two types of incremental imports: append and lastmodified. You can use the –incremental argument to specify the type of incremental import to perform.
You should specify append mode when importing a table where new rows are continually being added with increasing row id values. You specify the column containing the row’s id with –check-column. Sqoop imports rows where the check column has a value greater than the one specified with –last-value.
An alternate table update strategy supported by Sqoop is called lastmodified mode. You should use this when rows of the source table may be updated, and each such update will set the value of a last-modified column to the current timestamp.
When running a subsequent import, you should specify –last-value in this way to ensure you import only the new or updated data. This is handled automatically by creating an incremental import as a saved job, which is the preferred mechanism for performing a recurring incremental import.
First we are inserting a new row which will be updated in our HDFS.

The command for incremental import is:
1 | sqoop import --connect jdbc:mysql://localhost/employees --username edureka --table employees --target-dir /Latest_Employees --incremental append --check-column emp_no --last-value 499999 |

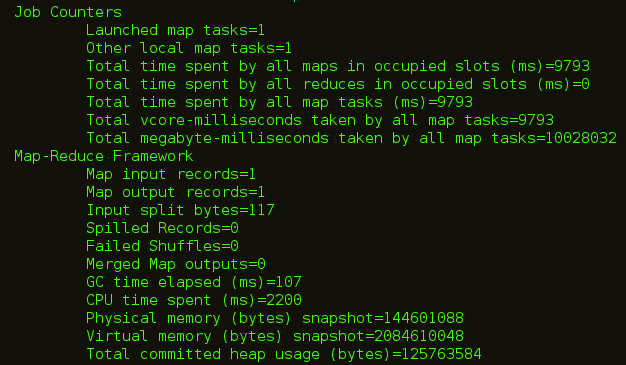
You can see in the below image, a new file is created with the updated data.

Sqoop – Import All Tables
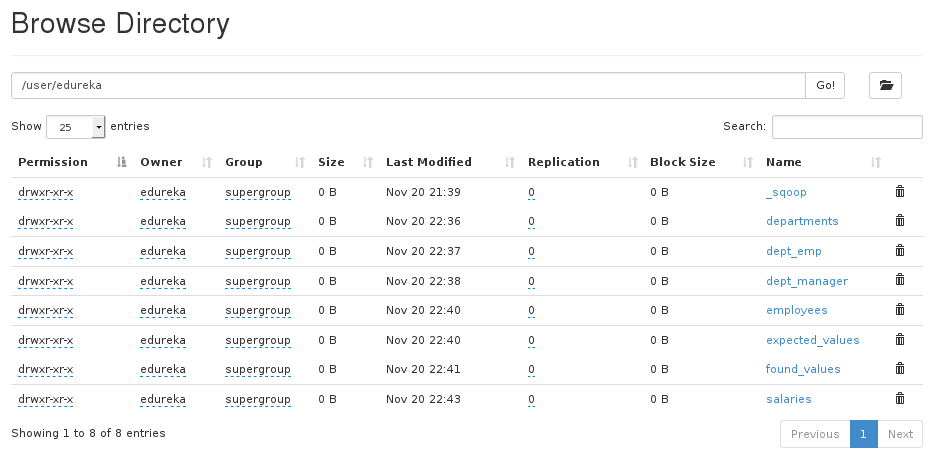
You can import all the tables from the RDBMS database server to the HDFS. Each table data is stored in a separate directory and the directory name is same as the table name. It is mandatory that every table in that database must have a primary key field. The command for importing all the table from a database is:
1 |
![]()
Sqoop – List Databases
You can list out the databases present in relation database using Sqoop. Sqoop list-databases tool parses and executes the ‘SHOW DATABASES’ query against the database server. The command for listing databases is:
1 | sqoop list-databases --connect jdbc:mysql://localhost/ --username edureka |
![]()
![]()
Sqoop – List Tables
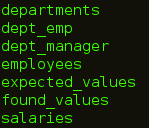
You can also list out the tables of a particular database in MySQL database server using Sqoop. Sqoop list-tables tool parses and executes the ‘SHOW TABLES’ query. The command for listing tables is a database is:
1 | sqoop list-tables --connect jdbc:mysql://localhost/employees --username edureka |
![]()
Sqoop – Export
As we discussed above, you can also export data from the HDFS to the RDBMS database. The target table must exist in the target database. The data is stored as records in HDFS. These records are read and parsed and delimited with user-specified delimiter. The default operation is to insert all the record from the input files to the database table using the INSERT statement. In update mode, Sqoop generates the UPDATE statement that replaces the existing record into the database.
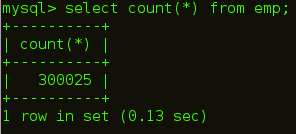
So, first we are creating an empty table, where we will export our data.

Command to export data from HDFS to relational database is:
1 | sqoop export --connect jdbc:mysql://localhost/employees --username edureka --table emp --export-dir /user/edureka/employees |
![]()
Sqoop – Codegen
In object-oriented application, every database table has one Data Access Object class that contains ‘getter’ and ‘setter’ methods to initialize objects. Codegen generates the DAO class automatically. It generates DAO class in Java, based on the Table Schema structure.
The command for generating java code is:
1 | sqoop codegen --connect jdbc:mysql://localhost/employees --username edureka --table employees |
![]()

You can see the path in above image where the code is generated. Let us go the path and check the files that are created.

I hope this blog is informative and added value to you. If you are interested to learn more, you can go through this Hadoop Tutorial Series which tells you about Big Data and how Hadoop is solving challenges related to Big Data.
Source: Apache Sqoop Tutorial for Beginners | Sqoop Commands | Edureka


